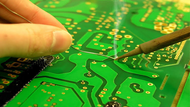
Four Essential Things To Know About Electronic Soldering
Posted by Admin on Sep 30th 2021
Solder is a fusible metal alloy that helps create permanent bonds between various metals on a circuit board. The process of joining metal pieces together using molten solder is known as soldering. With the help of a soldering iron, you can reach the melting point of the solder. The other materials you require during the soldering process include wire solder, with or without flux core, and flux.
How To Solder?
You can refer to IPC-A-620 documented standards to ensure that your soldering process is reliable and effective. It involves the following steps:
Clean the surface on which you will solder.
Plugin the soldering iron and set the temperature above the melting point of your solder.
Hold the soldering iron tip against the lead and contact point for few seconds. It helps to bring them both to the soldering temperature simultaneously.
Touch the solder wire to the lead and contact point a few times till the solder begins to flow.
Inspect the solder joint to ensure it provides full coverage over the lead and contact area.
You can trim the lead, but do not trim it into the solder joint, which can otherwise cause damage to the connection.
When using rosin activated or aqueous flux, clean the area with a flux remover.
What Type of Flux to Use?
If you need to avoid cleaning, no-clean flux is the right choice. You can leave the light residue on the board or remove it using a flux remover.
Rosin activated flux (RA) gives excellent solderability in various applications. You need to remove residues to prevent corrosion and for its aesthetics carefully.
You can leave Rosin flux or mildly activated rosin flux (RMA) on the circuit board after soldering until aesthetics become an issue.
Water-soluble flux (OA) is a very active flux that is easy to remove using DI water. You can also use isopropyl alcohol (IPA) to remove it. Ensure that you do not leave any water-soluble flux residues on the board, or it can corrode the metal easily.
What Temperature Should You Set for The Soldering Iron?
For lead-based solder, you can start with a soldering temperature of 600°- 650°F (316°- 343°C). For lead-free solder, the ideal temperature for starting is 650°- 700°F (343°- 371°C). The soldering iron tip should be heated enough to melt the solder and enable it to flow smoothly. Excessive heat can, however, cause damage to the components reducing the soldering tip lifespan.
Should You Use a Lead or Lead-Free Solder?
Lead-free solder has a higher melting point, which makes it challenging to work with. Lead solder is easy to work with and helps to form reliable joints. It generates low heat, which creates less thermal stress on the PCB. You can quickly bring lead-tin solder to working temperature. It flows well, is shock-resistant, has lesser structural internal flaws after cooling down. However, one of the most adverse effects of using lead-based solder is that it causes extremely harmful environmental impacts. The use of lead-free solder helps in eradicating lead from electronic production and waste recycling processes.
To Conclude:
Adhering to the soldering guidelines will help you create consistent and robust bonds and release high-quality circuit boards in the market.


