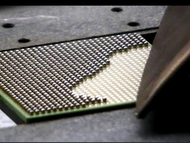
Seven Steps to Perform BGA Reballing Process
Posted by Admin on Sep 2nd 2021
In specific applications, you need to occasionally change the alloy of the BGA (ball grid array) component solder balls. BGA is a type of surface-mount package used in electronic products for mounting integrated circuits. The pins appear in the form of solder balls arranged in a grid pattern on the undersurface package, and it helps in increasing the area used for the connections. These solder balls are attached with the help of pads and flux via an exact automated process. BGA packages offer various advantages over their quad flat pack rivals, including lower track density, robustness, lower thermal resistance, and improved high-speed performance. However, for specific PCB assembly which requires customized configurations or to mitigate loose connections, you need to replace the soldered balls that appear on the BGA's grid. This process is known as BGA reballing.
While BGAs display better durability than the traditional arrays, the connections are susceptible to loosening over time due to extended use or exposure to harsh conditions. Loose connections can lead to unreliable performance, and hence to mitigate the associated risks, re-soldering of BGA's grid is essential for preventing any malfunctions in the PCB. Specific applications require the up-gradation of BGA chip which you can do through BGA reballing. You also need to perform BGA re-balling if heating causes the underneath solder ball in the BGA chip to cause solder bridging. Here is a step-by-step process for BGA Reballing.
Component Removal
You need to pre-heat the PCB and then apply heat to the top of the BGA component that you need to remove. Apply hit till the solder melts, and then you can remove or lift by using a vacuum.
Deballing
You need to apply water-soluble paste flux by using a syringe. Smear the paste across the balls of the device using a gloved finger. With the help of a good blade tip, you can remove the solder balls. Ensure that the surface is flat and does not contain any bumps.
Clean the Deballed Part
Clean the PCB surface using isopropyl alcohol and clean off the flux residue from the bottom of the deballed part.
Apply Paste Flux
Closely inspect the device to ensure no scratches and lifted pads on the bottom of the device. Apply water-soluble paste flux to this bottom part. Evenly spread the flux with a soft brush till it forms uniform thickness.
Attach the Preform Ball
Place the preform ball on the PCB. Ensure that the preform lines align to the patterns on the device.
Place Device on Top of the Preform
You need to attach the BGA component to the ball array perform. Ensure that the pattern orientation is correct. Then place the device in a reflow oven. The temperature settings should be proper.
Inspect
While the device is still slightly warm, you need to remove the preform from it. Closely inspect the device to ensure that all the balls are correctly transferred to the device and clean it with water and a soft brush. Inspect the reballed device to determine if it follows the set standards.
To Conclude:
The given instructable will help you perform the BGA reballing process efficiently. It will enable you to recreate all the ball solder joints to ensure that the BGA Chip delivers the desired performance.


